tensorboard 외부접속
나는 tensorboard는 유용해 보였지만 사용법을 몰라서 못쓰던 유저였다. 그래서 외부접속 같은 옵션들을 간략하게 설명하려고 한다.

먼저 내 콘다는 /root/anaconda3/envs/jupyter/에 있다.
해당 콘다의 python의 패키지는 어디에 존재하는지는 운영체제마다 다르겠지만 linux(ubuntu20.04)는
가상환경의 경로안에 lib/<python버전>/site-packages에 패키지들이 존재한다.
에러에 대한 원래 코드를 확인하고 싶다면 아래 경로를 확인해보았으면 한다.

import matplotlib.pyplot as plt
import numpy as np

import torch
import torchvision
import torchvision.transforms as transforms

import torch.nn as nn
import torch.nn.functional as F
import torch.optim as optim

# transforms
transform = transforms.Compose(
    [transforms.ToTensor(),
    transforms.Normalize((0.5,), (0.5,))])

# datasets
trainset = torchvision.datasets.FashionMNIST('./data',
    download=True,
    train=True,
    transform=transform)
testset = torchvision.datasets.FashionMNIST('./data',
    download=True,
    train=False,
    transform=transform)

# dataloaders
trainloader = torch.utils.data.DataLoader(trainset, batch_size=4,
                                        shuffle=True, num_workers=2)


testloader = torch.utils.data.DataLoader(testset, batch_size=4,
                                        shuffle=False, num_workers=2)

# 분류 결과를 위한 상수
classes = ('T-shirt/top', 'Trouser', 'Pullover', 'Dress', 'Coat',
        'Sandal', 'Shirt', 'Sneaker', 'Bag', 'Ankle Boot')

# 이미지를 보여주기 위한 헬퍼(helper) 함수
# (아래 `plot_classes_preds` 함수에서 사용)
def matplotlib_imshow(img, one_channel=False):
    if one_channel:
        img = img.mean(dim=0)
    img = img / 2 + 0.5     # unnormalize
    npimg = img.numpy()
    if one_channel:
        plt.imshow(npimg, cmap="Greys")
    else:
        plt.imshow(np.transpose(npimg, (1, 2, 0)))
Downloading http://fashion-mnist.s3-website.eu-central-1.amazonaws.com/train-images-idx3-ubyte.gz to ./data/FashionMNIST/raw/train-images-idx3-ubyte.gz
Extracting ./data/FashionMNIST/raw/train-images-idx3-ubyte.gz to ./data/FashionMNIST/raw
Downloading http://fashion-mnist.s3-website.eu-central-1.amazonaws.com/train-labels-idx1-ubyte.gz to ./data/FashionMNIST/raw/train-labels-idx1-ubyte.gz
Extracting ./data/FashionMNIST/raw/train-labels-idx1-ubyte.gz to ./data/FashionMNIST/raw
Downloading http://fashion-mnist.s3-website.eu-central-1.amazonaws.com/t10k-images-idx3-ubyte.gz to ./data/FashionMNIST/raw/t10k-images-idx3-ubyte.gz
Extracting ./data/FashionMNIST/raw/t10k-images-idx3-ubyte.gz to ./data/FashionMNIST/raw
Downloading http://fashion-mnist.s3-website.eu-central-1.amazonaws.com/t10k-labels-idx1-ubyte.gz to ./data/FashionMNIST/raw/t10k-labels-idx1-ubyte.gz
Extracting ./data/FashionMNIST/raw/t10k-labels-idx1-ubyte.gz to ./data/FashionMNIST/raw
Processing...
Done!
/root/anaconda3/envs/jupyter/lib/python3.6/site-packages/torchvision/datasets/mnist.py:480: UserWarning: The given NumPy array is not writeable, and PyTorch does not support non-writeable tensors. This means you can write to the underlying (supposedly non-writeable) NumPy array using the tensor. You may want to copy the array to protect its data or make it writeable before converting it to a tensor. This type of warning will be suppressed for the rest of this program. (Triggered internally at  /opt/conda/conda-bld/pytorch_1603728993639/work/torch/csrc/utils/tensor_numpy.cpp:141.)
  return torch.from_numpy(parsed.astype(m[2], copy=False)).view(*s)
class Net(nn.Module):
    def __init__(self):
        super(Net, self).__init__()
        self.conv1 = nn.Conv2d(1, 6, 5)
        self.pool = nn.MaxPool2d(2, 2)
        self.conv2 = nn.Conv2d(6, 16, 5)
        self.fc1 = nn.Linear(16 * 4 * 4, 120)
        self.fc2 = nn.Linear(120, 84)
        self.fc3 = nn.Linear(84, 10)

    def forward(self, x):
        x = self.pool(F.relu(self.conv1(x)))
        x = self.pool(F.relu(self.conv2(x)))
        x = x.view(-1, 16 * 4 * 4)
        x = F.relu(self.fc1(x))
        x = F.relu(self.fc2(x))
        x = self.fc3(x)
        return x


net = Net()
criterion = nn.CrossEntropyLoss()
optimizer = optim.SGD(net.parameters(), lr=0.001, momentum=0.9)
import os
os.getcwd()
'/home/ducj/jupyter/pytorch_study'from torch.utils.tensorboard import SummaryWriter
# 기본 `log_dir` 은 "runs"이며, 여기서는 더 구체적으로 지정하였습니다
writer = SummaryWriter('runs/fashion_mnist_experiment_1')
# 임의의 학습 이미지를 가져옵니다
dataiter = iter(trainloader)
images, labels = dataiter.next()

# 이미지 그리드를 만듭니다.
img_grid = torchvision.utils.make_grid(images)

# 이미지를 보여줍니다.
matplotlib_imshow(img_grid, one_channel=True)

# tensorboard에 기록합니다.
writer.add_image('four_fashion_mnist_images', img_grid)
위 코드는 keras의 tensor board의 예제이다
tutorials.pytorch.kr/intermediate/tensorboard_tutorial.html
TensorBoard로 모델, 데이터, 학습 시각화하기 — PyTorch Tutorials 1.6.0 documentation
TensorBoard로 모델, 데이터, 학습 시각화하기 파이토치(PyTorch)로 딥러닝하기: 60분만에 끝장내기 에서는 데이터를 불러오고, nn.Module 의 서브클래스(subclass)로 정의한 모델에 데이터를 공급(feed)하고,
tutorials.pytorch.kr
내 코드의 경로는 '/home/ducj/jupyter/pytorch_study'에 해당하는데
from torch.utils.tensorboard import SummaryWriter
writer = SummaryWriter('runs/fashion_mnist_experiment_1')
명령어를 사용하게 되면
/home/ducj/jupyter/pytorch_study/runs/fashion_mnist_experiment_1에 생성이 된다.
그런 후 tensorboard --logder <run까지만> 입력을 하게되면 실행되고 port의 default 값은 6006이다.
외부접속을 허용하게 하려면 방화벽을 열어야 되는데 sudo ufw allow 6006을 하게되면 6006 포트가 열린다.
또한 인터넷에서 포트포워딩 같은 것을 해주어야 접속이 가능하다. host 0.0.0.0은 모든 host를 허용한다고 하는 것인데 우리가 매번 치던 localhost는 127.0.0.1에 해당된다.

bind_all이라는 기능도 있던데 따로 host를 생성해주는 것 같았다.

마지막으로 ssh를 사용하고 있을 때이다.
ssh -L <내 로컬컴퓨터에서 접속할 port>:<매칭할호스트:포트> <계정명>@<ssh 호스트>

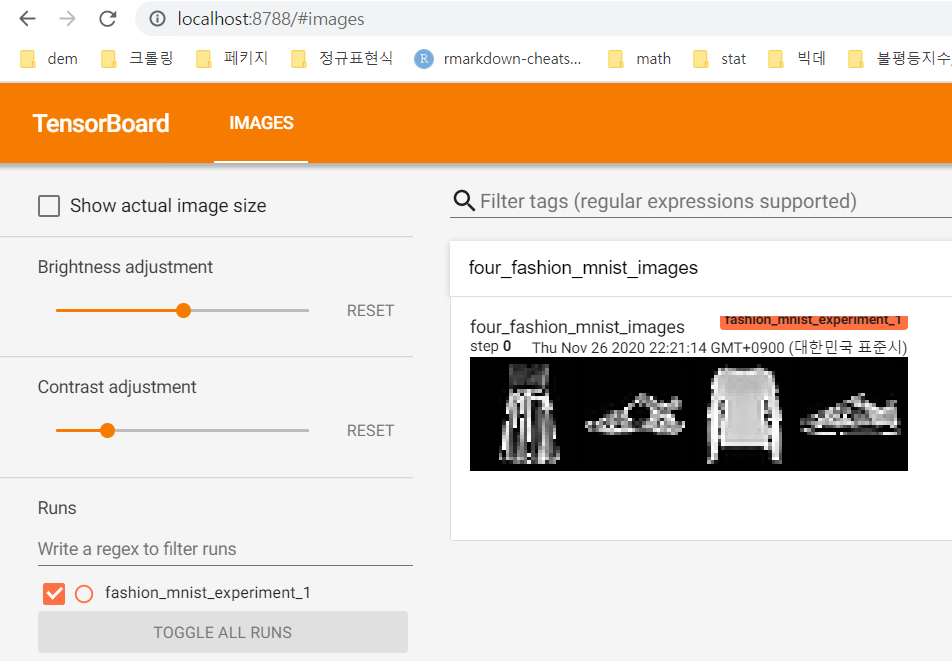
자 ssh를 통해 외부접속이 열렸다. 한번 확인해보자.

위와 같이 localhost를 열었다.

잘들어가진다.